
Last verified: 2026-10-28
Affiliate disclosure: We may earn a commission if you subscribe to Helium 10 through our links. Screenshots and workflow notes come from our own signed-in Helium 10 account (English UI, Managed Refund Service / Refund Genie). Codes: AIPILOTDAILY20 and AIPILOTDAILY10 via https://i.helium10.com/jR0Z10. Offers change, so recheck before paying.
Quick answer
Helium 10 Refund Genie (labeled Managed Refund Service in Site Map and the Products menu) is Helium 10’s managed FBA reimbursement tool. It sits under Business Operations, next to Inventory Management, Alerts, and Follow-Up—not under keyword or listing tools.
On 2026-10-28 we opened it from Site Map and from the Products mega-menu on an Elite account with the English UI. The first screens are an in-app hero (Set up My Account), a Refund Genie enrollment page with a Proceed button, an Accept Fee Terms gate that quotes a 10% fee on successful recoveries, then Connections with no seller or PPC linked. A live claims queue needs finished enrollment plus a seller connection—we stop at that gate rather than inventing case IDs or recovered totals.
| Field | What we saw |
|---|---|
| Product names | Refund Genie / Managed Refund Service |
| Where | Site Map → Business Operations → Managed Refund Service; also Products → Amazon Tools → Business Operations |
| Plan badge in header | Elite |
| Primary CTAs | Hero Set up My Account; enrollment Proceed; fee step Accept Terms and Continue |
| Fee (fee-terms screen) | 10% of funds successfully recovered; card auto-charged ~15 days after invoice email |
| Cancel note on fee screen | Cancel anytime; Helium 10 stops filing claims on your behalf |
| Seller / PPC | Neither connected yet on Connections |
Honest takeaway: This guide shows how to find Refund Genie, walk the setup / Proceed gate, read the 10% fee terms, and see why an empty Connections page blocks a live claims table.
Related: Helium 10 guides · coupon codes · Profits tutorial if you care about P&L after reimbursements land.
Ready to try Helium 10?
New checkout codes we verified 2026-10-28:
Monthly: AIPILOTDAILY20 (20% off for 6 months) · Annual: prefer AIPILOTDAILY10 (≈10% forever on our annual test). Confirm on your own summary.
What Helium 10 Refund Genie is
Helium 10 markets Refund Genie / Managed Refund Service as a managed Amazon FBA reimbursement workflow: the pitch is automated scanning for returned or damaged inventory, monthly reports, and help collecting refunds so you spend less time digging through fulfillment reports yourself. English sellers usually search helium 10 refund genie or helium 10 managed refund service—both point at the same Business Operations tool.
It is not the same as:
- Profits — P&L after you connect Seller Central (our Profits how-to)
- DIY browsing of Amazon’s own reimbursement tools with no Helium middle layer
- A free “button that refunds Amazon automatically” with no success fee
The in-app hero we captured leads with “Fully Automated Reimbursements — No Recovery, No Charge!” and a Set up My Account button. That is enrollment marketing—not a live claims spreadsheet.
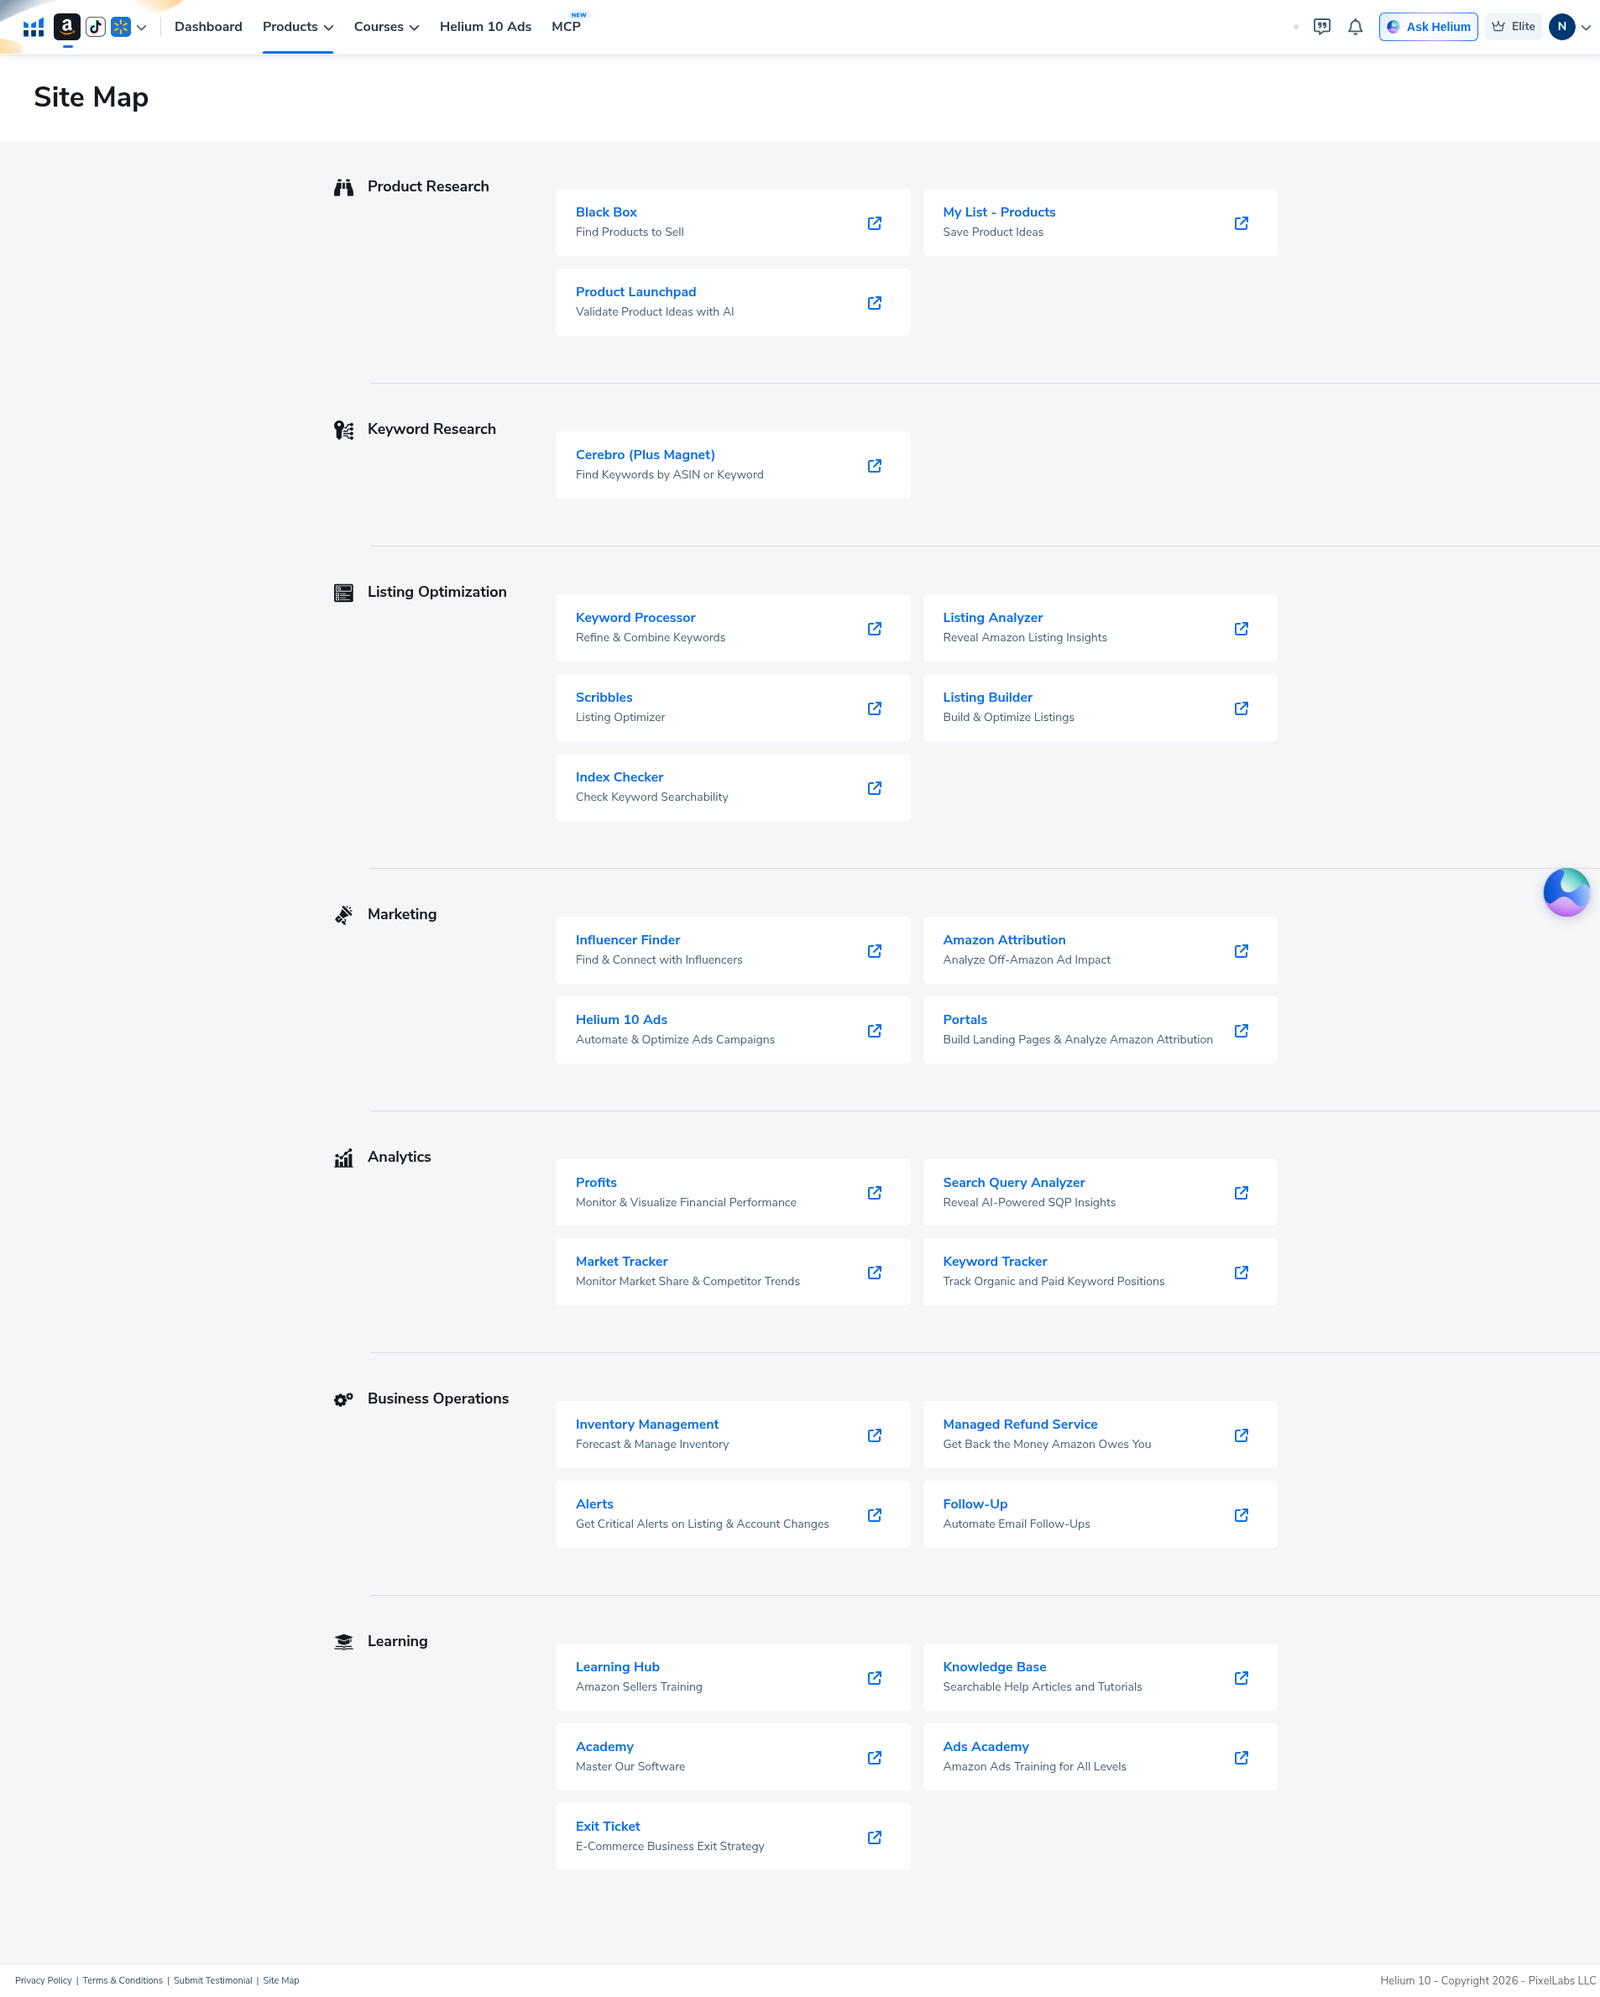
Step 1 — Find it in the Site Map under Business Operations
From the members area, open Site Map. Scroll to Business Operations. Click Managed Refund Service. On 2026-10-28 the card subtitle read Get Back the Money Amazon Owes You. Neighbor cards: Inventory Management, Alerts, and Follow-Up.
Header showed Elite. That does not by itself mean claims are already running—the next screens still asked us to set up the account.
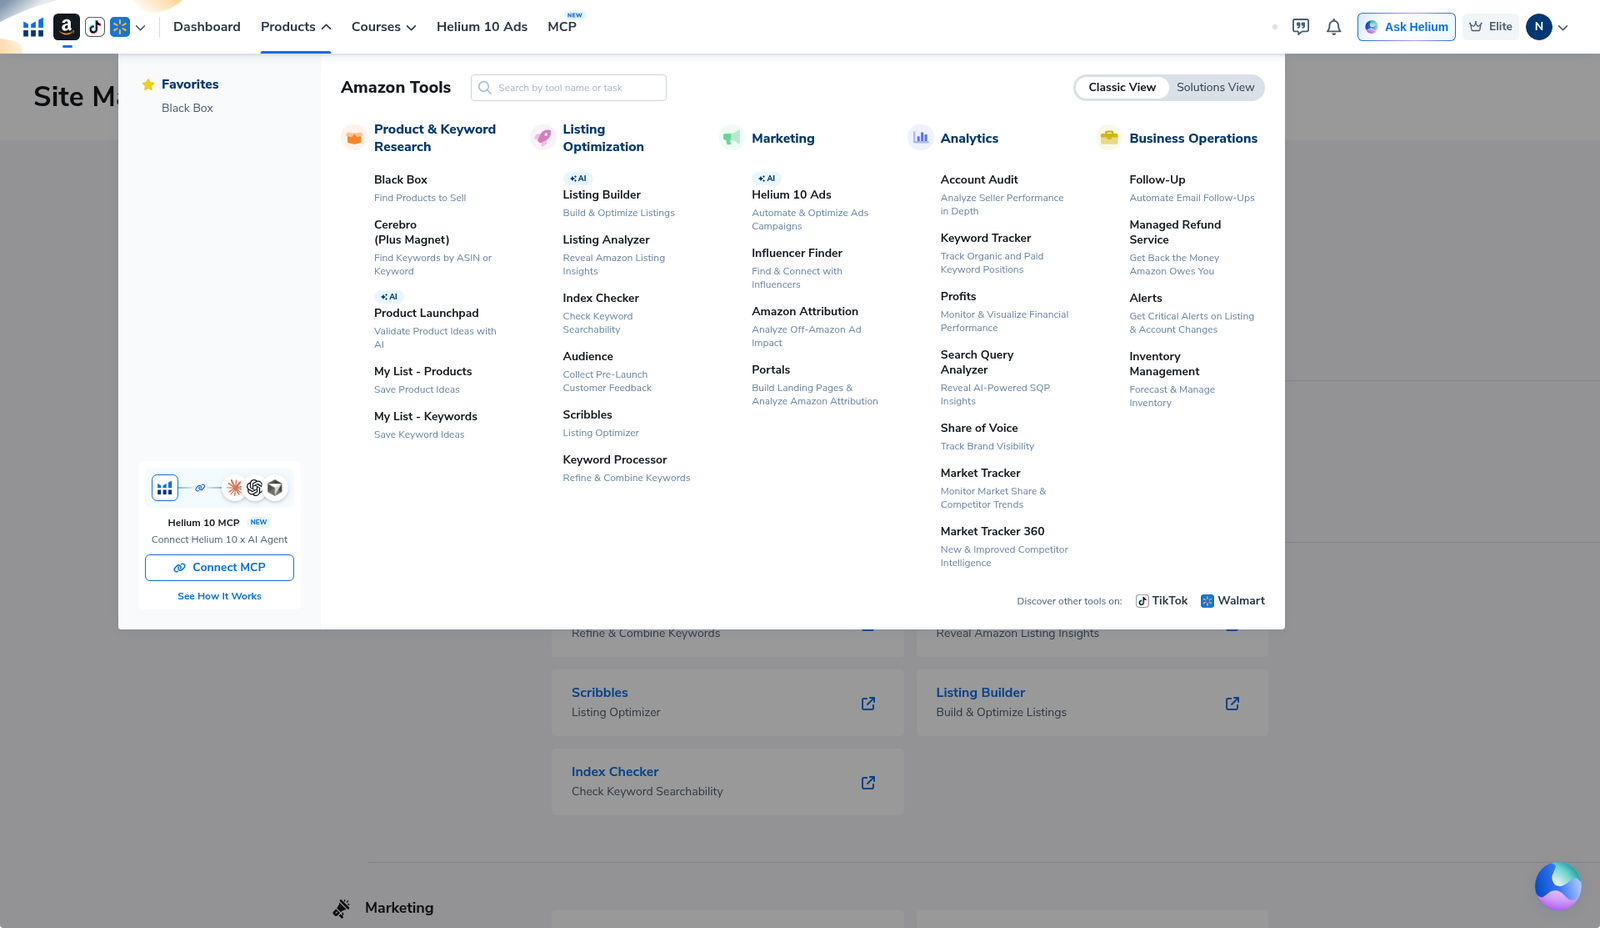
Step 2 — Same tool from the Products mega-menu
Hover Products. In the Amazon Tools mega-menu, the Business Operations column lists Managed Refund Service (“Get Back the Money Amazon Owes You”) next to Follow-Up, Alerts, and Inventory Management.
Step 3 — Land on the Refund Genie in-app hero
The tool opened an in-app hero for the new Managed Refund Service: coin tagline about fully automated reimbursements, headline about maximizing reimbursements, short upgrade copy, and a blue Set up My Account button. Below the banner the page title is Refund Genie with subtitle Reimbursement Assistance.
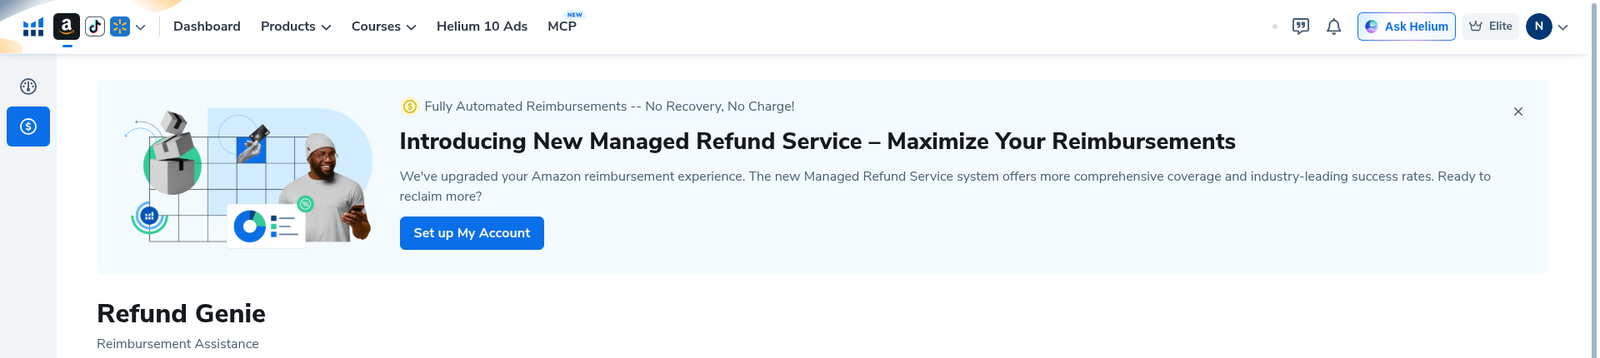
Treat this as the start of setup, not proof that claims are already filing.
Step 4 — Refund Genie “add to account” Proceed gate
Below the hero, Helium asks Did You Add Refund Genie to your Helium 10 account? The copy pitches tracking returned or damaged inventory, scanning product status, generating monthly reports, and saving time on FBA refunds. The primary button is blue Proceed—an enrollment opt-in, not a case list.
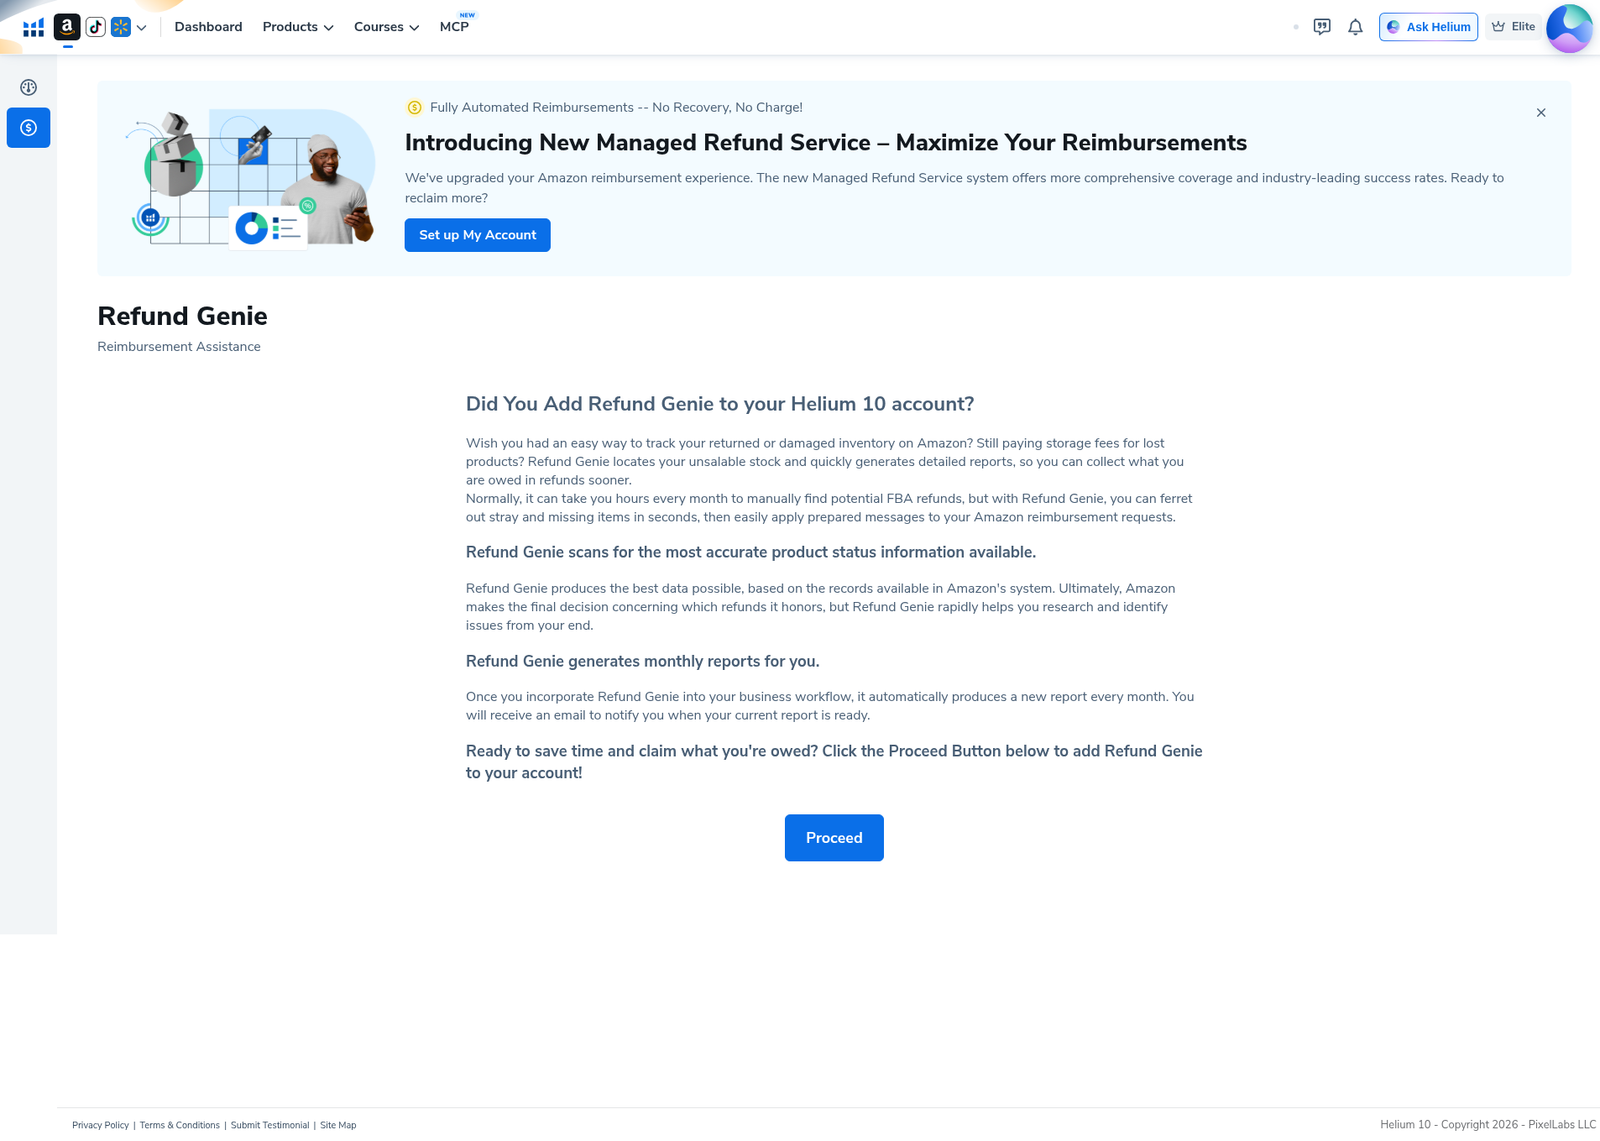
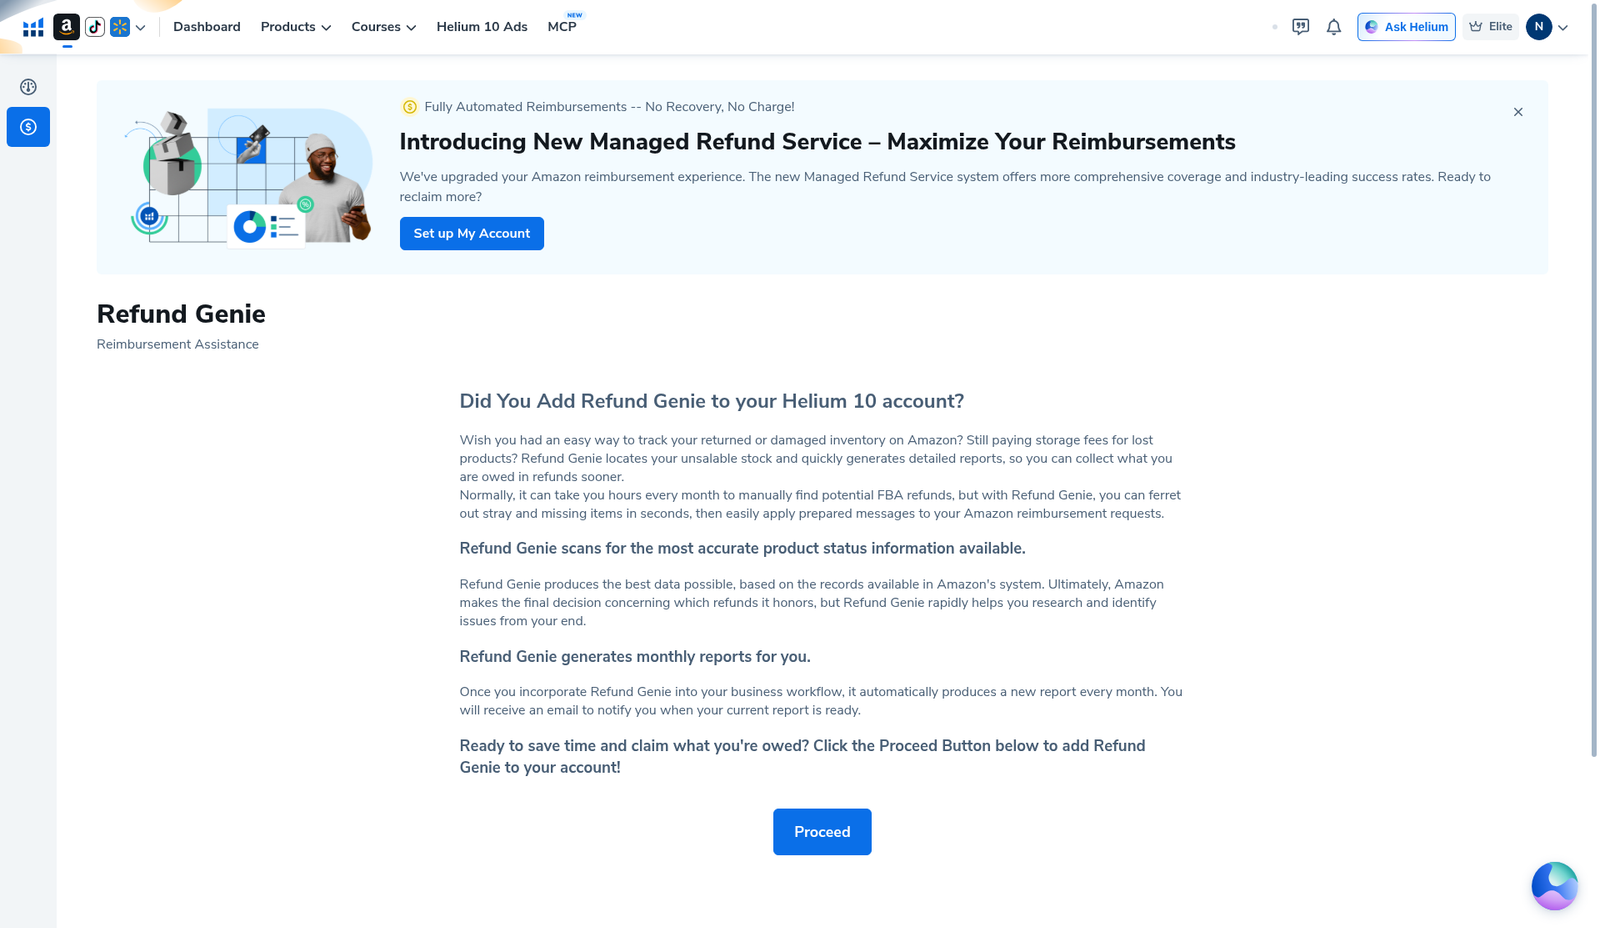
Treat Proceed as the opt-in before (or alongside) the fee-terms step.
Step 5 — Accept fee terms: 10% boxes and Accept Terms and Continue
On Accept Fee Terms, Helium asked us to acknowledge two checkboxes before Accept Terms and Continue would enable:
- Agree that successful recoveries via Managed Refund Service incur a 10% service fee on funds recovered.
- Agree that the credit card on file is auto-charged 15 days after invoices are emailed.
Notes on the same screen: you are not charged before finishing later setup steps; you can cancel anytime and Helium stops filing claims on your behalf. With both boxes empty, Accept Terms and Continue stayed grey. We left the boxes unchecked for this walkthrough—no live claims queue without accepting those terms.
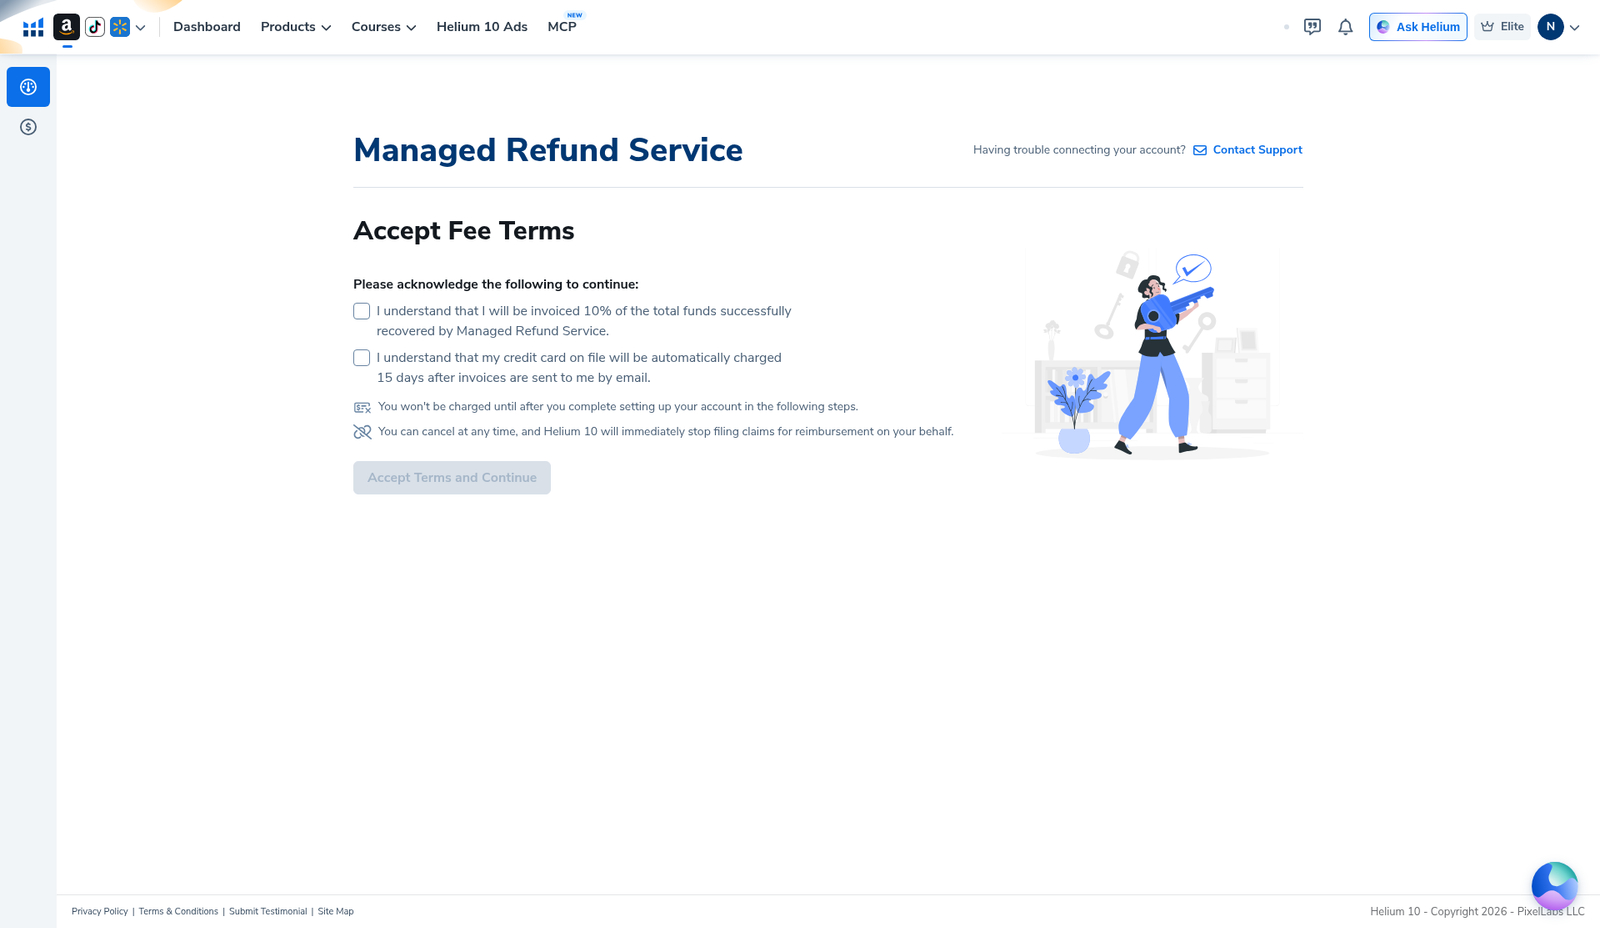
Decision frame: if you rarely have FBA discrepancies, 10% of nothing is nothing—but enrollment still wants those checkboxes. If you regularly leave reimbursements on the table, model 10% against your own historical Amazon reimbursements before you enroll.
Step 6 — Connections: connect seller (and PPC if needed)
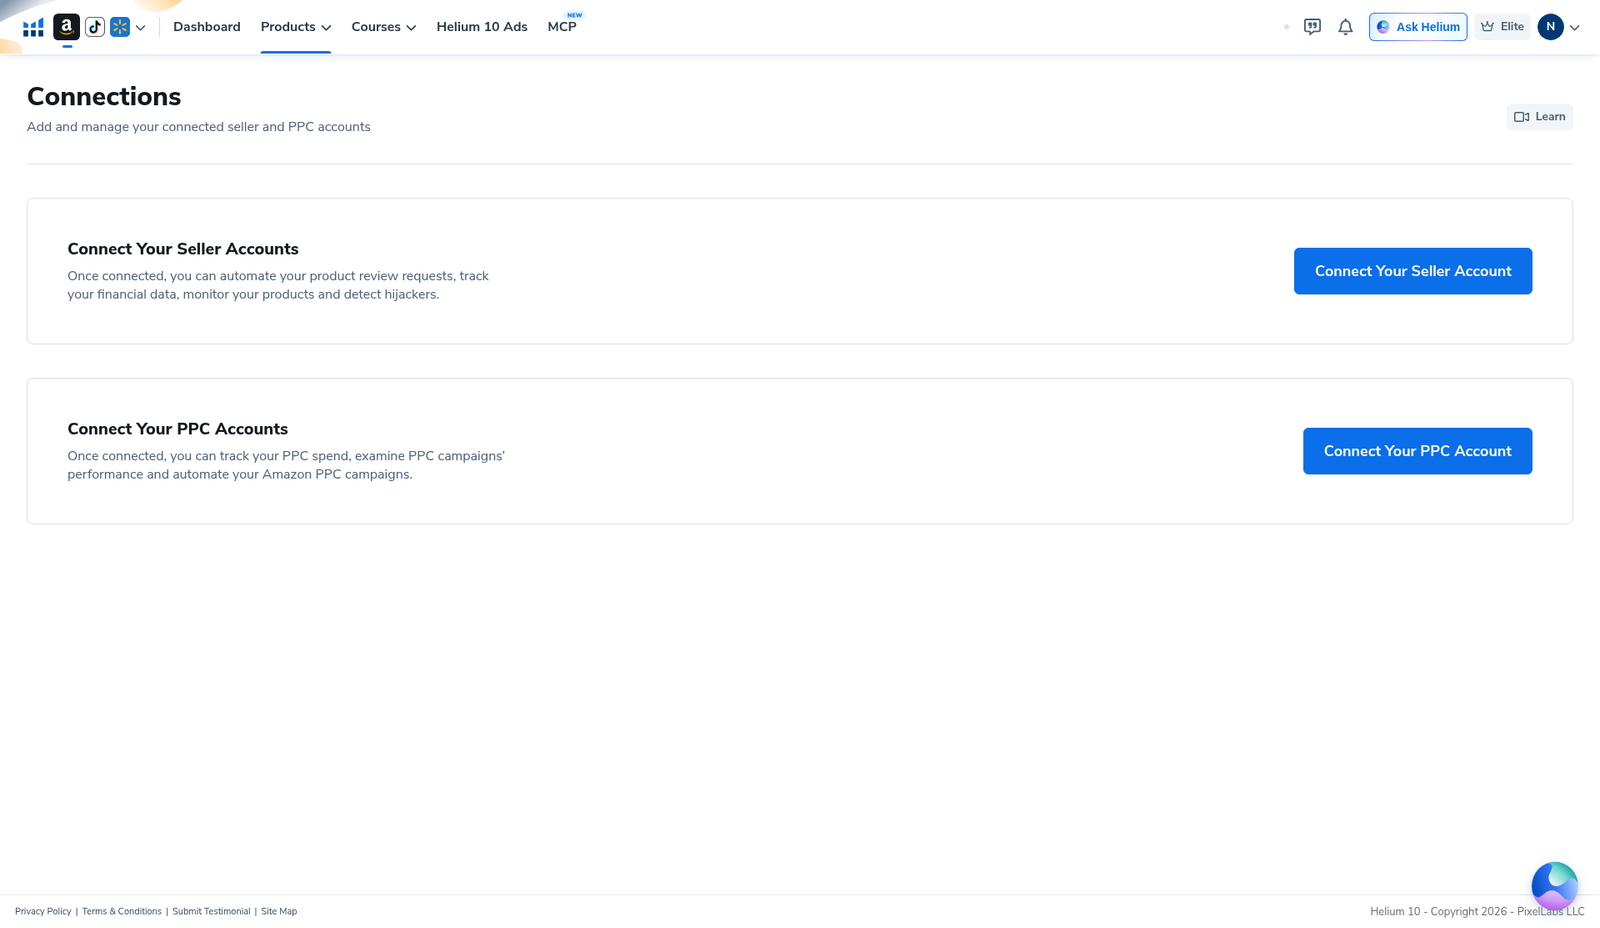
Account → Connections is where you link a seller account (and PPC if you use ads tools). Without a seller link, Helium cannot pull the FBA inventory / fee data a reimbursement tool needs. Our test account still showed empty seller and empty PPC states—so we never saw a claims spreadsheet.
When this tool is worth opening vs skipping
Worth opening (and maybe Set up My Account / Proceed) if: you run meaningful Amazon FBA volume, you already know reimbursements slip through, and you would rather pay ~10% of recovered cash than staff the audit yourself.
Skip or wait if: you are not ready to accept the 10% fee terms, you still have not connected the seller accounts you need for other Helium tools (Profits is a separate connect flow), or your discrepancy history is near zero.
Common mistakes
- Expecting a Cerebro-style data grid the moment you click the Site Map card—you get an in-app hero + Proceed + fee terms first.
- Forgetting the 10% success fee (and the 15-day card charge note) when you compare “free DIY Amazon claims” vs managed.
- Mixing this up with Helium 10 money-back guarantee (subscription refund policy)—different topic from FBA reimbursements.
- Assuming Elite alone means claims are already running—you still need enrollment, fee terms, and a seller connection.
- Skipping Connections and wondering why no claim cases appear after you click Proceed.
FAQ
Is Helium 10 Refund Genie the same as Managed Refund Service?
Yes on our build. Site Map and the Products menu use Managed Refund Service; the tool page title says Refund Genie (Reimbursement Assistance). English SEO still uses “Refund Genie.” Same Business Operations entry on 2026-10-28.
Do I need Diamond or Elite?
Our header showed Elite while viewing the hero and fee terms. The page did not display a clear “your plan blocks this” wall before Set up My Account / Proceed; plan gating past fee terms is account-specific—recheck on your plan.
What does Helium 10 charge for Managed Refund Service?
Per the Accept Fee Terms screen we captured: 10% of funds successfully recovered, with the card on file auto-charged about 15 days after the invoice email. Recheck the live checkboxes on your account before you enroll.
Can I cancel later?
The fee-terms screen says you can cancel anytime and Helium 10 will immediately stop filing claims on your behalf. Confirm any trailing invoices on recoveries already won before you close.
Will I see live claim cases in this guide?
This walkthrough covers Site Map / Products navigation, the in-app hero, the Proceed enrollment gate, fee terms, and an empty Connections page from English-UI screenshots on 2026-10-28. A live claims queue needs finished enrollment plus a seller connection.
Which coupon code should I use?
Monthly: AIPILOTDAILY20 (20% off for 6 months). Annual: prefer AIPILOTDAILY10. Link only https://i.helium10.com/jR0Z10.
Bottom line
Helium 10 Refund Genie / Managed Refund Service is easy to find under Site Map → Business Operations (and the Products mega-menu). Walk Set up My Account → Proceed → Accept Fee Terms → connect your seller on Connections. Use that path when FBA discrepancies are real enough that ~10% of recovered cash beats DIY audits.
Next reads: Helium 10 coupon code · guides hub · Frankenstein tool · Profits tutorial.

Leave a Reply